GNOME Builder
Note
It is assumed that you have already gone through the Using flatpak section to setup flatpak on your x86 workstation.
Builder is a fantastic IDE traditionally used for building GNOME GTK+ apps however the fun doesn’t have to stop there. It can build KDE apps as long as there is flatpak metadata for the application - more on that later.
First, checkout the official documentation for GNOME Builder
Install the stable version of GNOME Builder:
$ flatpak install flathub org.gnome.Builder
Run GNOME Builder:
$ flatpak run org.gnome.Builder
You can later update the stable version of GNOME Builder:
$ flatpak update org.gnome.Builder
Setting up QEMU on Debian based systems
Since Builder relies on statically linked qemu binaries, you will either need to run an OS that already does this for you (like Fedora, Debian Buster, or PureOS) or fix up your Debian stable workstation to enforce static linking before starting Builder. Manually fixing Debian qemu binaries (setting flags: F) is required until a patched version of qemu is distributed by your OS. Without statically linked qemu binaries, you will not be able to build an installable armhf or aarch64 flatpak from Builder.
To perform these operations, you will need to be the root user (sudo is not good enough).
You can first check what the flags are set to for qemu-arm and then perform a similar operation to see the flags for qemu-aarch64:
$ cat /proc/sys/fs/binfmt_misc/qemu-arm
enabled
interpreter /usr/bin/qemu-arm-static
flags: 0C
offset 0
magic 7f454c4601010100000000000000000002002800
mask ffffffffffffff000000000000000000feffffff
Since this is a proc file, it can’t simply be edited in a standard editor so you will need to remove the information from binfmt’s register and replace it.
qemu-arm:
$ echo -1 > /proc/sys/fs/binfmt_misc/qemu-arm
$ echo ":qemu-arm:M:0:\x7f\x45\x4c\x46\x01\x01\x01\x00\x00\x00\x00\x00\x00\x00\x00\x00\x02\x00\x28\x00:\xff\xff\xff\xff\xff\xff\xff\x00\x00\x00\x00\x00\x00\x00\x00\x00\xfe\xff\xff\xff:/usr/bin/qemu-arm-static:F" > /proc/sys/fs/binfmt_misc/register
$ cat /proc/sys/fs/binfmt_misc/qemu-arm
enabled
interpreter /usr/bin/qemu-arm-static
flags: F
offset 0
magic 7f454c4601010100000000000000000002002800
mask ffffffffffffff000000000000000000feffffff
qemu-aarch64:
$ echo -1 > /proc/sys/fs/binfmt_misc/qemu-aarch64
$ echo ":qemu-aarch64:M:0:\x7f\x45\x4c\x46\x02\x01\x01\x00\x00\x00\x00\x00\x00\x00\x00\x00\x02\x00\xb7\x00:\xff\xff\xff\xff\xff\xff\xff\x00\xff\xff\xff\xff\xff\xff\xff\xff\xfe\xff\xff\xff:/usr/bin/qemu-aarch64-static:F" > /proc/sys/fs/binfmt_misc/register
$ cat /proc/sys/fs/binfmt_misc/qemu-aarch64
enabled
interpreter /usr/bin/qemu-aarch64-static
flags: F
offset 0
magic 7f454c460201010000000000000000000200b700
mask ffffffffffffff00fffffffffffffffffeffffff
Building a C/GTK+3 (libhandy) flatpak with GNOME Builder
For this example, the geary application will be built (written in C and available in Debian apt repositories). This build was done on an x86 system running Debian testing.
The libhandy repository has already been cloned and the master branch checked out.
When you open Builder, select to “Open” a new project and navigate to the libhandy folder.
When Builder opens a project, it immediately tries to build it for your host’s architecture. You can see this by clicking the build log (brick wall). If you would like to build for a different architecture, this is a good time to cancel the build. After the build is cancelled, select what architecture you would like to build for from the devices drop down menu:
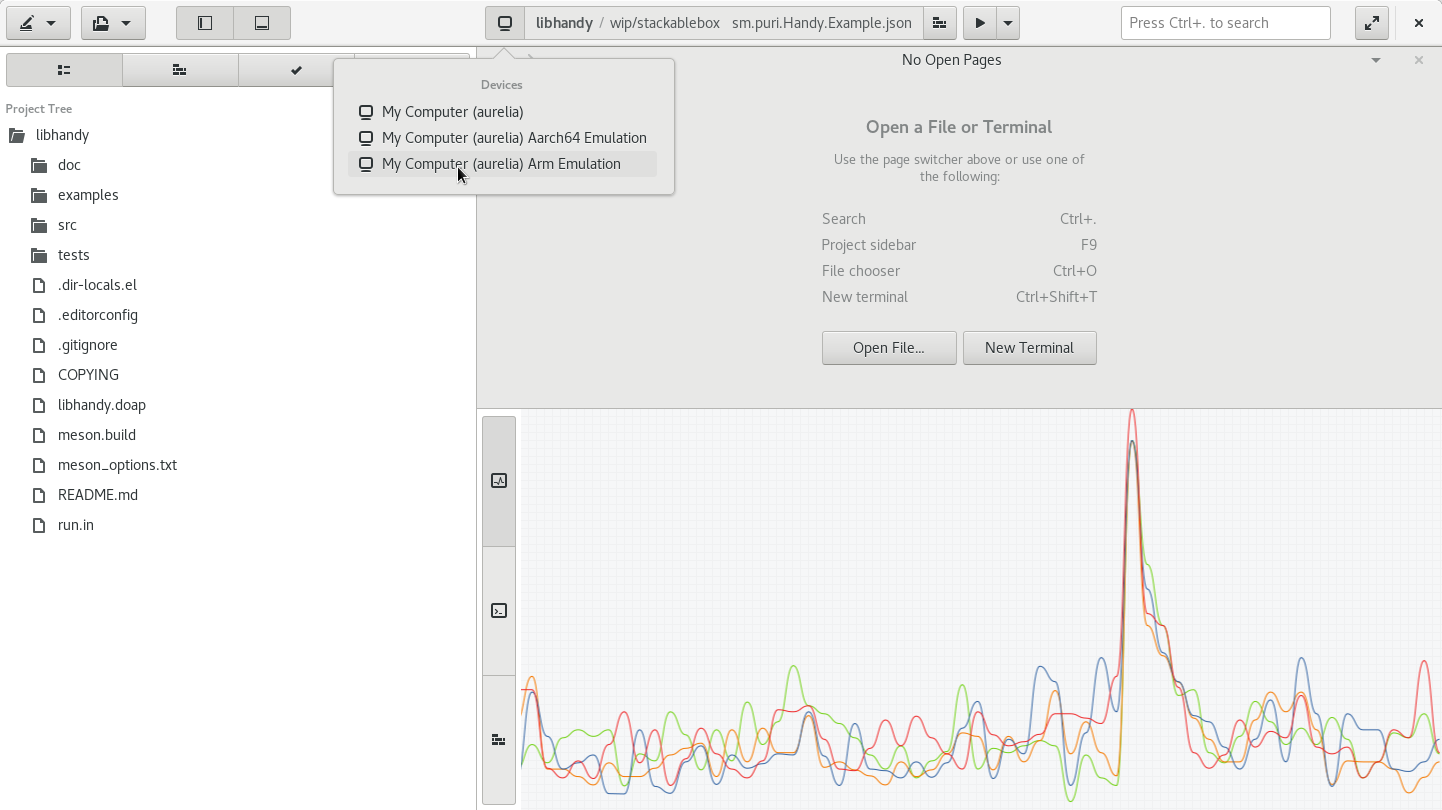
As soon as you select a different architecture, a build is started for that architecture.
Note
If your build dependencies for the project are not installed you will know from watching the Builder “Build Log” in the bottom panel (brick wall icon) where the unsatisfied dependencies will be complained about until they are resolved.

Builder will stop after configuring the project. To complete the flatpak bundle creation, you can click any of the remaining build steps listed in the “Build Details” drop-down to resolve the build through that step.
Alternatively, you can click the omnibar in Builder and select the “Export Bundle” button and patiently wait while Builder progresses through flatpak creation.
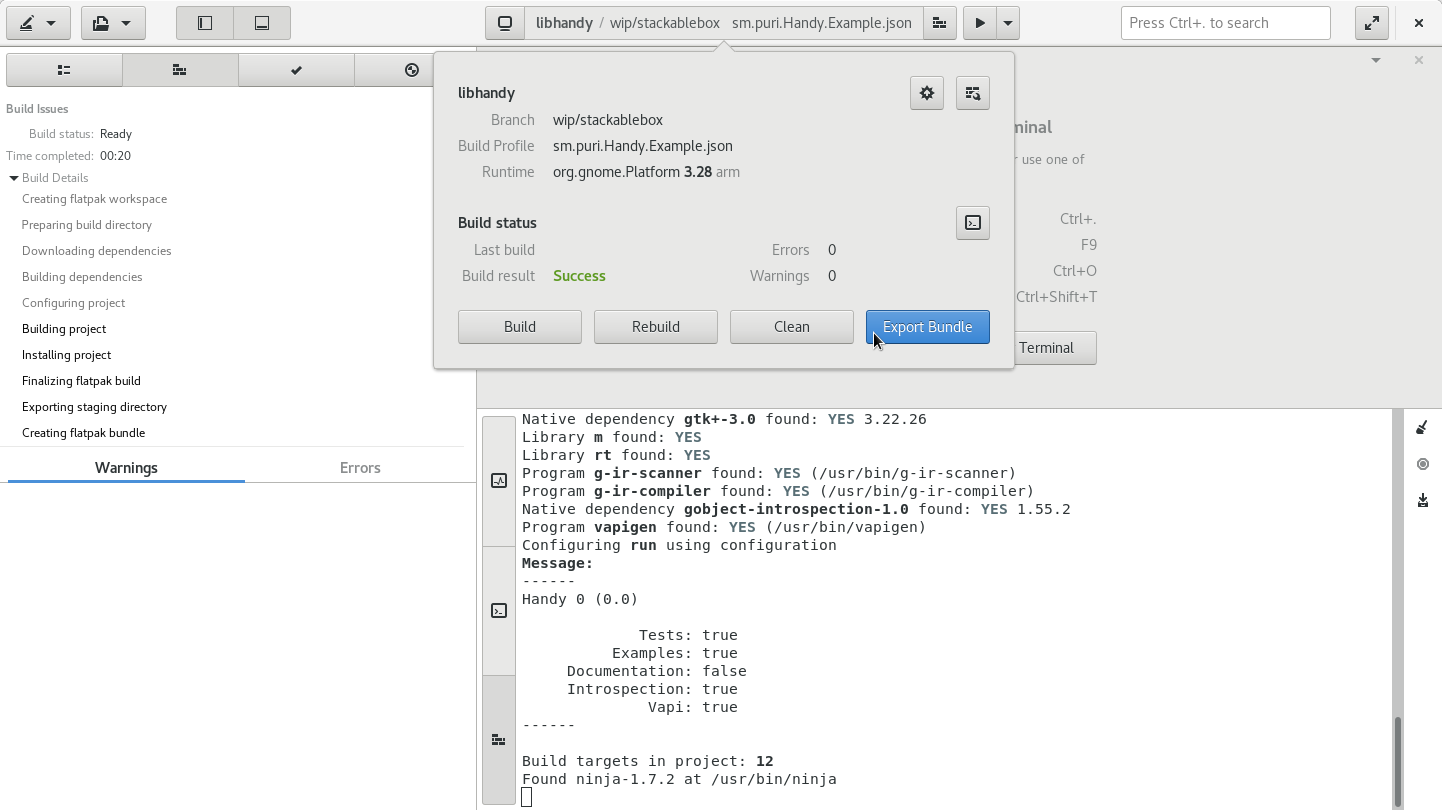
When the flatpak creation is finished, a nautilus window will pop up in the directory where the sm.puri.Handy.Example.flatpak is located. In this example, the flatpak can be found here: ~/.var/app/org.gnome.Builder/cache/gnome-builder/projects/libhandy/flatpak/staging/arm-wip-stackablebox/sm.puri.Handy.Example.flatpak
Deploying a C/GTK+3 (libhandy) flatpak to Phosh running on i.MX6 board
To run this flatpak you must first get the flatpak onto the dev board and install it. The dev board should have a working networking setup and IP address that you can use to ssh/scp. The OS has ssh running and enabled by default (port 22). The system should also have flatpak installed.
Scp the flatpak to the system, install it and run it (from an ssh session):
user@workstation:~$ scp ~/.var/app/org.gnome.Builder/cache/gnome-builder/projects/libhandy/flatpak/staging/arm-wip-stackablebox/sm.puri.Handy.Example.flatpak purism@<sut_ip>:~/
purism@pureos:~$ sudo flatpak install sm.puri.Handy.Example.flatpak
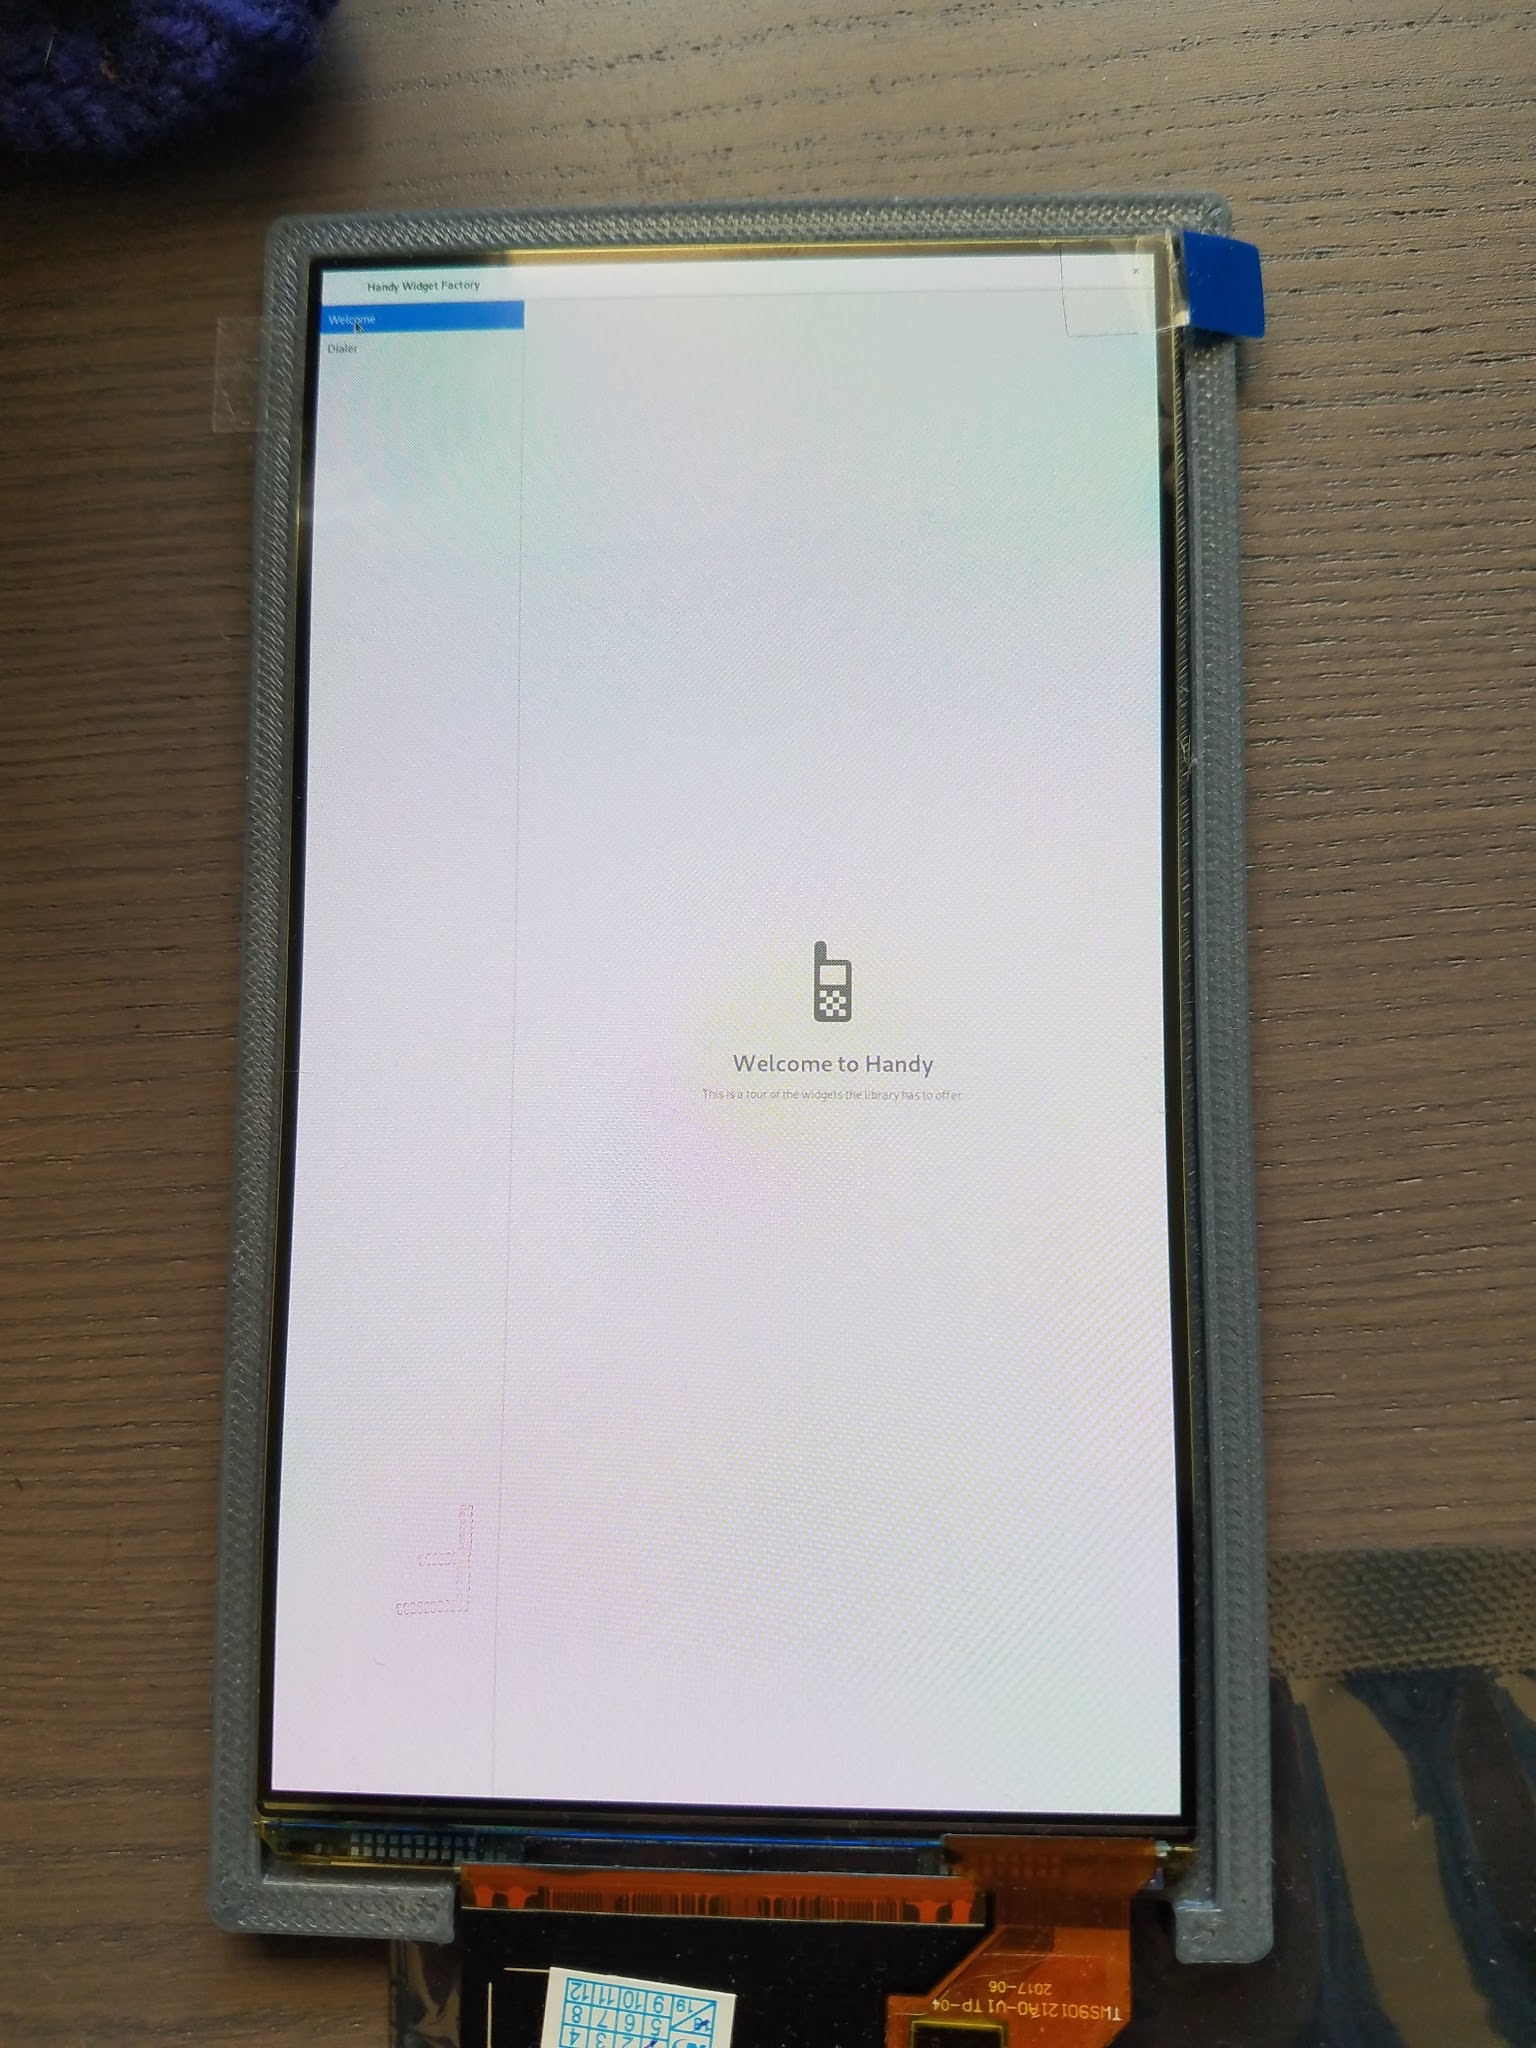
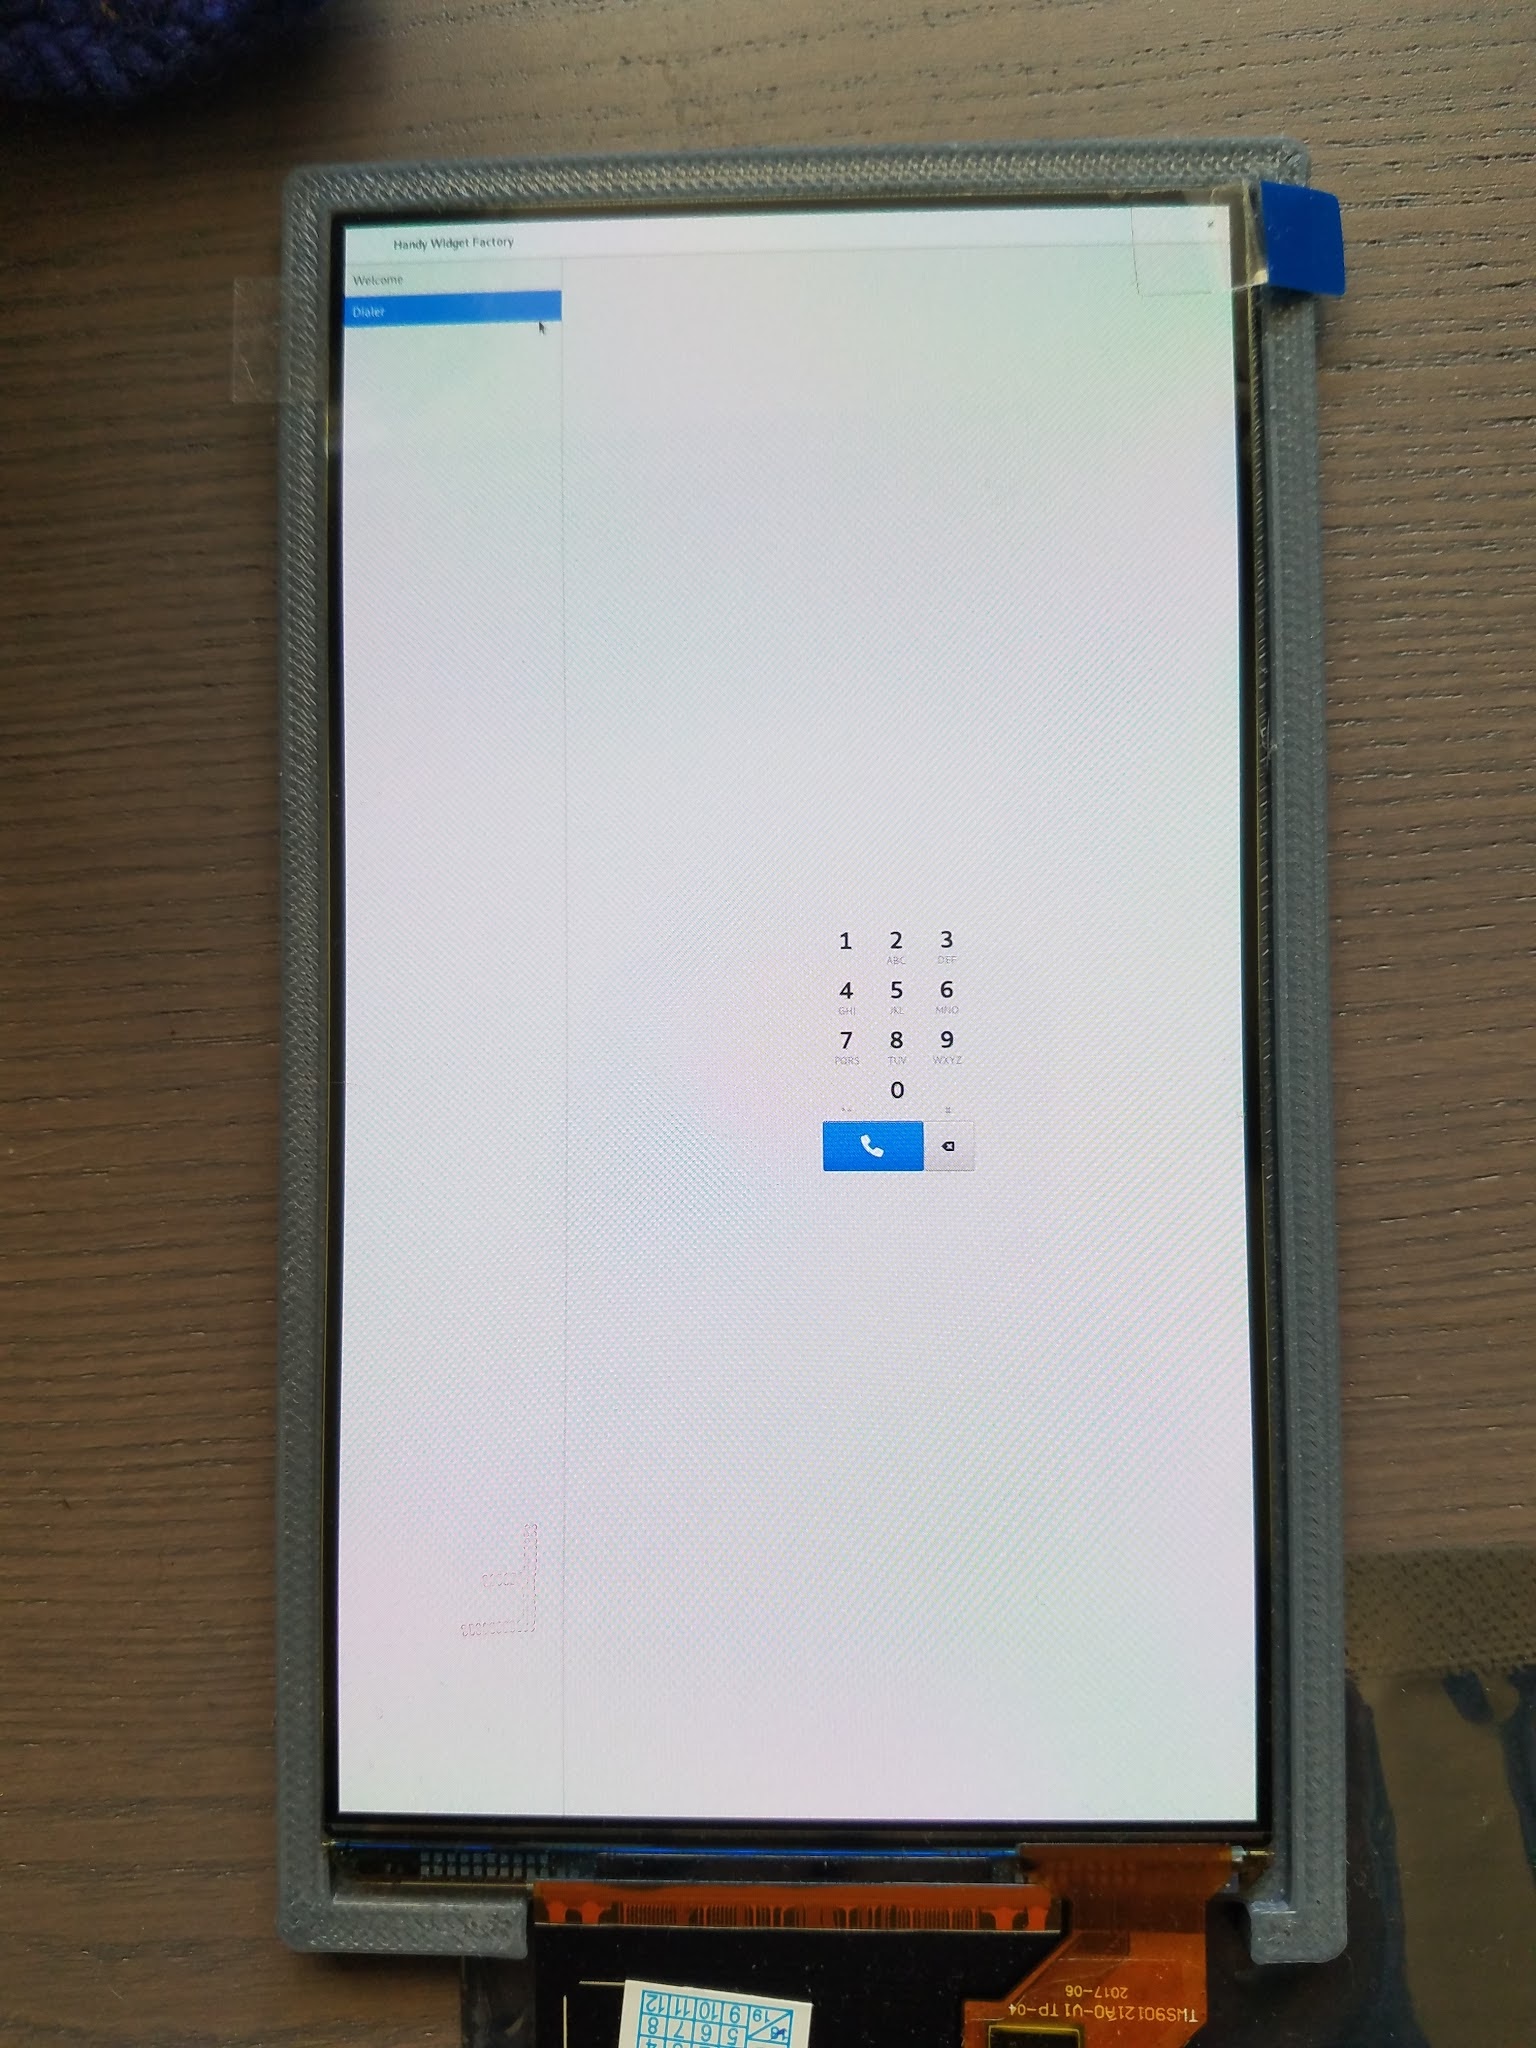
purism@pureos:~$ flatpak run sm.puri.Handy.Example
You will see the application start on the screen connected to the board.